I recently wrote a workflow that will use the SharePoint Object Model to manipulate sites or just about anything you want. I seperated the functionality of the workflow from the actual sites manipulation into two assemblies. One for the SharePoint Sequential Workflow and one for the SharePoint sites manipulation. Iwanted my manipulatingassembly to incorporate a Config file. Where would I place the config file? the following is an alternative, that was useful in what I wanted to do with my config file.
If you have ever developed workflows, you know that the assemblies are placed in the GAC. Well, the config files would have to be stored in the GAC as well. My workflow doesn't access the web.config for the site, and alternatives to map a config to a location on the local machine wasn't quite working either. I think it had issues with security. What I decided to do is store a 'Config' file in SharePoint.
The biggest draw for doing this was to have an accessible file where specific users could actually edit the config file. What better place than a SharePoint Site. I also used InfoPath forms to create a more ascetically pleasing config file that non-technical users can edit.
Step 1: create an info path form: this is a sample of the field that
I stored as "Approvers"

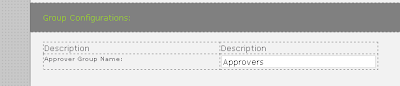
this means that the key value pair looks like this: key: Approvers and value: "Approvers". (The Text field is actually called 'Approvers')
Not the best example because they are the same in this case but an authorized end user could change the group name of approvers to be the site 'Members' or any other created group name. When the workflow runs it will look at the value entered in this field to get the name of the Approvers group.
Step 2: using XSD.exe you can create a class to serialize your infopath form. First, in InfoPath under file>>save as source. This will create a file called myschema.xsd. Then using XSD.exe use the command: xsd myschema.xsd /c
this will produce a class you simply rename, it looks like the following:( I renamed it 'workflowConfig')
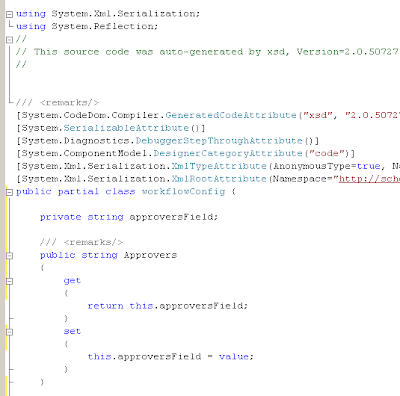
You see that it has a property exposed to you. If you have multiple properties, more will be created for you. I used reflection to then be able to access the properties like you would a config file.
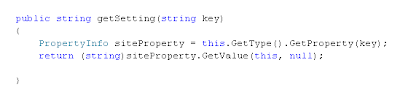
this method is added to the class that was created for you by the XSD.exe.
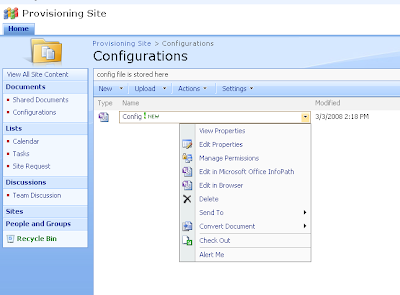
Step 3: Access the Config file stored in SharePoint.
this step requires you to access the root site and the Form Library that stores the config file and then deserialize the form with your generated class.
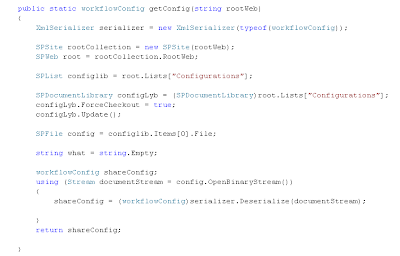
As you can see, you have to send a rootURL of the site, and access the document Library called, "Configurations" and since there is only one entry in that Forms Library, you can just use the first entry in the library to access our config file.
Step 4: Use the Config File.
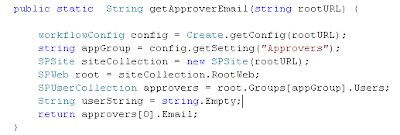
This static method was placed in the Manipulating DLL as you can see the Class is called "Create", but it access the local static method called "getConfig" which was posted earlier. Reflection gave us the ability to access the config file like a key value pair. this Method will give you the email of the first user in the "Approvers" group in SharePoint. If you were to change the approver group, an end user can change the config file or InfoPath form in SharePoint and the code would read a new Group and therefore a different UserEmail. Also if the a different user is added to the group, the new user's email will be read by your code.
Hopefully this helps, as you consider some alternatives to doing something similar. I know that there are details missing in this post but I will update this post when I have time and go through some of the detail that I missed. Any questions, let me know.
Good luck
Juan